This post will show you how to stop automatic update, download and installation of Windows 10 updates on your PC. Automatic Windows updates can sometimes consume your data, consume your PC power and slow down your PC when it occur at the wrong time. Unlike downward version of Windows, the Windos 10 & 11 is compulsory and there was no way to stop the auto updates until recently.
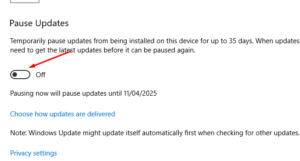
In Windows 10, there are 2 ways to stop the auto updates download and installation: First is to pause the updates temporarily for up to 35 days but when your PC resume, the PC will need to get the latest updates before it can be paused again.
To do that, click on windows, click on ‘settings’ gear icon, select ‘updates and security’ and click on Advanced options
The mostly effective method is to disable the automatic update based on your PC’s manufacturer’s settings – I’m using a DELL PC.
In this method, you will disable the drivers and BIOS update because these are the updates that are mostly optional and frequent.
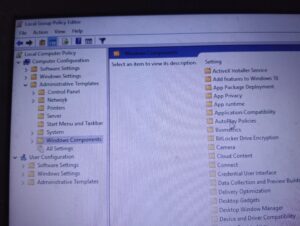
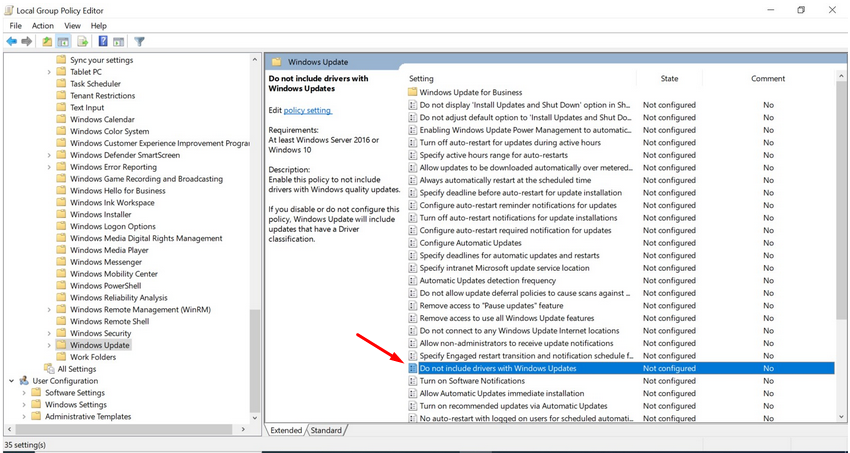
On your PC, press ‘Windows key’ + ‘R’ on your keyword. Type gpedit.msc and click OK to open the Local Group Policy Editor.
Click and browse the following folder path Computer Configuration > Administrative Templates > Windows Components > Windows Update
On the right side, double-click the ‘Do not include drivers with Windows Update’ policy.
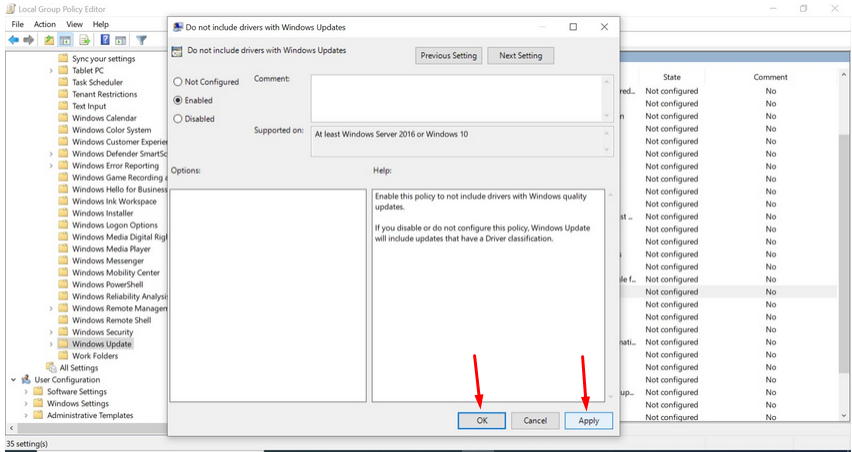
On the pop-up option, select the ‘Enabled’ option. Click ‘Apply’ and click ‘OK’.
TO RE-ENABLE AUTO UPDATES
follow the steps from the beginning and under ‘Do not include drivers with Windows Update’ select ‘Disable’ and apply.