
Image slider is one of the major functionality of a dynamic and contemporary website. This post will show you how to add image slider functionality to a WordPress website at different locations including post, page, sidebar and widget areas.
On your WordPress dashboard, click on plugin follow by add new. In the add new plufin search box, search for ‘MetaSlider‘

image slider
Click on install, after installation, click on activate
On the MetaSlider page you can begin by uploading or drag and drop the images you want to use to the a slider, you also choose the image from your image library so I will use images from my media library

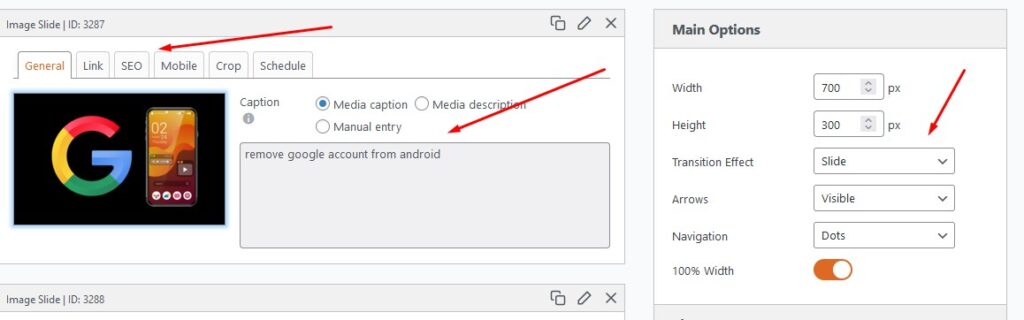
Once you upload or select your preferred images for the slider, it will load to a new page where you have to configure the settings of the slider. First set the media caption and description for all your images (optional) and on the left, set the main options of the images like width, height, transition effect, arrows and navigation settings.
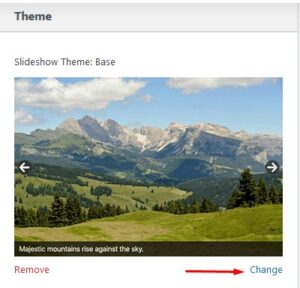
The next settings is the image slider theme, under theme, click on change to change the theme from the list of the available themes to your desired theme.
You can also scroll down to customize the settings of the slider arrows, navigation, caption, play/pause button etc. when you are done with everything, click on ‘Save’ at the top right to save your slider. You can also click on ‘Add slide’ to add a new image slide to your current slider

After you have save your slider, scroll down to the bottom of your slider page and copy the slider shortcode for the slider (each slider has it unique shortcode). Paste the shortcode where you want the slider to appear i.e post, page, sidebar/widget area (depends on the width of the slider).
Here’s my slider below
 remove google account from android